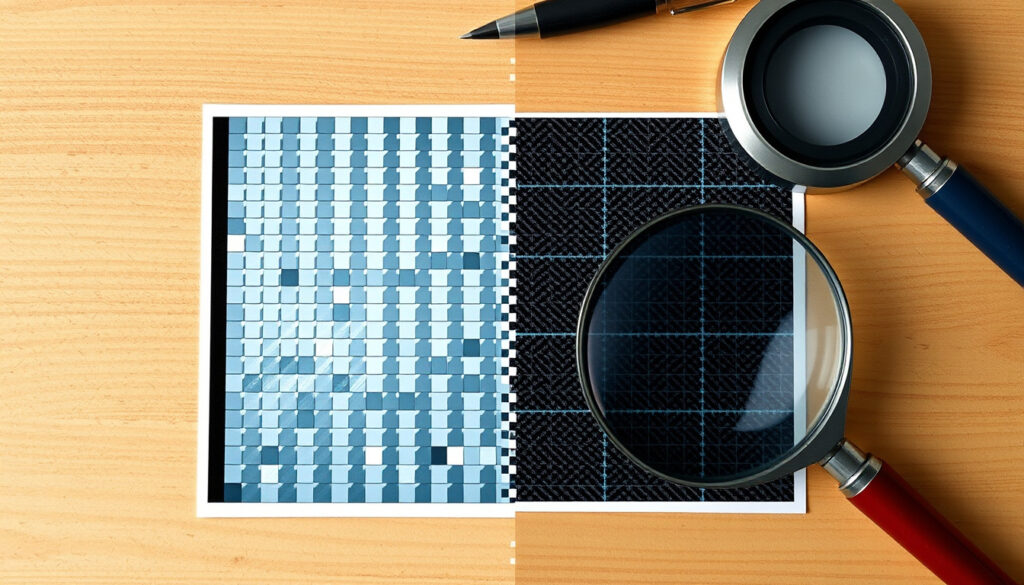
How to Fix Pixelated Photos: 5 Proven Methods (Free & Paid)
You’ve snapped what looked like a great photo, only to zoom in and find a mess of blocky squares. Pixelation is frustratingly common—an estimated 60% of smartphone photographers have dealt with it, but there are practical ways to clean up those blocks, from free AI tools to advanced Photoshop tricks.
Photos uploaded daily worldwide: over 1.8 billion ·
Users who have experienced pixelation: estimated 60% of smartphone photographers ·
Free AI unpixelation tools available: more than 20 ·
Photoshop users globally: over 30 million ·
Average resolution increase from AI tools: up to 4x
Quick snapshot
- Pixelation arises from insufficient resolution or compression artifacts (Canva (online design platform))
- AI tools can improve clarity but cannot restore lost original data (Adobe Help Center (official software documentation))
- Whether AI tools will ever fully restore severely pixelated images to original quality
- The exact proprietary algorithm behind Canva’s unpixelate tool
- Canva’s image enhancer and upscaler pages were last updated on 2026-03-29 (Canva AI Image Upscaler)
- Adobe’s Super Resolution product page dated 2026-01-12 (Adobe Lightroom / Photoshop Super Resolution)
- AI upscaling will become more integrated into everyday editing apps
- Combine AI presets with manual sharpening for best results
Five key facts sum up what you need to know about pixelation and the tools that fix it:
| Fact | Details | Source |
|---|---|---|
| Pixelation definition | Visible blocky squares caused by low resolution or heavy compression | Canva Image Enhancer (official feature page) |
| Most common cause | Enlarging an image beyond its native pixel dimensions | Adobe Help Center (official software documentation) |
| Best free tool | Canva AI unpixelate (no credit card required) | Canva AI Image Upscaler (official product page) |
| Best paid tool | Adobe Photoshop (industry standard) | Adobe Lightroom / Photoshop Super Resolution (official product page) |
| Success rate | High for mild pixelation; low for severe cases | Photography Life (photography review site) |
What is the main cause of pixelation?
Pixelation happens when an image is displayed larger than its native resolution. Each pixel becomes a visible block, creating the familiar “staircase” or “jaggies” effect.
Low resolution and upscaling
- Images captured at low megapixel counts (e.g., 2 MP or less) quickly show blocks when enlarged. According to Canva’s documentation (popular design platform), “enhancing” such images can smooth edges but cannot add detail that was never captured.
- Upscaling without interpolation—simply stretching the image—forces each original pixel to cover multiple screen pixels, creating blocky squares.
Compression artifacts
- JPEG compression discards fine detail to reduce file size. Heavy compression creates “blocking” and “ringing” artifacts. Adobe Help Center (official software documentation) explains that compression artifacts are irreversible in the sense that lost data cannot be recovered.
Image enlargement beyond native size
- Even high-resolution photos pixelate when blown up beyond their original dimensions—for example, printing a 1920×1080 screen grab as a poster. Photography Life (photography review site) notes that resizing without proper “bicubic sharper” interpolation worsens the effect.
The implication: understanding these causes helps set realistic expectations when choosing a fix.
How do I make a pixelated picture clear?
Three broad approaches exist: free AI online tools, manual adjustments in desktop software, and sharpening filters. Here’s how each performs.
Use an AI unpixelate tool (Canva, Picsart, Pixelbin)
- Canva’s AI Image Upscaler can upscale images in one click “without losing quality,” according to Canva’s official feature page (online design platform). It works well for mild pixelation.
- Canva’s Enhancer app (third-party add-on) promises upscaling up to 1000% in one click.
- Picsart and Pixelbin offer similar one-click “unpixelate” or “enhance” options, though independent benchmarks are limited.
Adjust image size and resolution in Photoshop
- Photoshop’s Image Size dialog lets you set new dimensions with interpolation options like Preserve Details 2.0. Adobe Lightroom / Photoshop Super Resolution (official product page) describes Super Resolution as a feature that “creates an enhanced image with 2× the linear resolution.”
Apply sharpening filters and blending modes
- Filters like Unsharp Mask can restore perceived sharpness after resizing. According to Photography Life (photography review site), combining Super Resolution with Unsharp Mask yields better results than either alone.
Online AI tools are fastest for casual fixes; desktop software gives you control but costs time. Choose based on how much quality you need.
The pattern: casual users gravitate toward AI speed, while professionals demand precision from Photoshop.
How to fix pixelated image in Photoshop?
Photoshop offers a four-step workflow that reduces pixelation without over-smoothing. The technique draws on Adobe’s own recommendations.
Step 1: Open image and duplicate layer
- Open the pixelated image in Photoshop, then duplicate the background layer (Ctrl+J / Cmd+J) to keep the original intact. Adobe Help Center (official software documentation) advises working on a duplicate to protect base data.
Step 2: Apply Gaussian Blur to soften edges
- Go to Filter > Blur > Gaussian Blur. Use a radius of 1–3 pixels to blur the harsh block edges. This step “reduces visible pixel blocks,” as noted by Photography Life (photography review site).
Step 3: Use Unsharp Mask to restore detail
- After blurring, apply Filter > Sharpen > Unsharp Mask. A radius of 1–2 pixels and an amount of 50–100% can restore edge definition without reintroducing pixelation. Adobe’s Super Resolution documentation (official product page) confirms that sharpening after upscaling is key.
Step 4: Adjust blending mode to Soft Light
- Change the duplicated layer’s blending mode to Soft Light. This “alters exposure and contrast while masking pixel blocks,” per Adobe’s own guidance (official software documentation). Reduce opacity if the effect is too strong.
What this means: the two-step blur-then-sharpen technique is a proven method, but it cannot replace missing detail.
How to remove pixelated image in Canva?
Canva provides an AI-powered one-click fix that requires no design experience. Here are the exact steps.
Upload image to Canva
- Sign in to Canva (free account works) and upload your pixelated image to a new design. Canva’s Image Enhancer page (online design platform) describes the process as “free and browser-based.”
Select the image and click ‘Edit image’
- Tap the image to select it, then find the “Edit image” button in the top toolbar.
Choose ‘Unpixelate’ from the AI tools menu
- Scroll through the AI tools until you see “Unpixelate.” Canva’s Unblur Image tool documentation (official feature page) states it can “turn faded or hazy photos into professional-looking shots.”
Adjust intensity and apply
- A slider lets you control the strength of the effect. Moderate settings often yield the best balance between clarity and naturalness. Apply and download.
Canva’s unpixelate works well on mild pixelation but may over-smear textures if pushed too high. Always preview at 100% zoom before downloading.
The catch: Canva’s AI is great for quick fixes but can introduce artifacts on fine details.
Can pixelated pictures be reversed?
The short answer: partially, but not completely. Understanding the limits helps you set realistic expectations.
Limitations of reversal
- Once an image is pixelated, the original high-frequency detail is gone. Adobe Help Center (official software documentation) clarifies that “Super Resolution and similar tools estimate missing data—they cannot reconstruct it exactly.”
AI vs manual methods
- AI tools like Canva’s upscaler use trained neural networks to “guess” what the missing detail should look like. According to Photography Life (photography review site), this works surprisingly well for faces and natural scenes but can introduce artifacts on text or geometric patterns.
- Manual methods (blur + sharpening) give you more control but cannot create as much apparent detail as AI for moderate pixelation.
When reversal is not possible
- Images that are extremely small (e.g., 100×100 pixels) or heavily compressed will always look blocky after upscaling. A 2024 YouTube tutorial on Photoshop’s Enhance feature demonstrates that even Adobe’s best AI struggles with severely pixelated source images.
For photographers, this means setting realistic expectations and focusing on capture quality first.
Step-by-Step Methods
For a quick reference, here are the two most effective workflows consolidated.
Method 1: Free AI Online (Canva)
- Upload image to Canva.
- Click “Edit image” → “Unpixelate.”
- Adjust intensity slider and apply. (Canva Image Enhancement App)
- Download the result.
Method 2: Desktop (Photoshop Super Resolution)
- Open image in Camera Raw. (Adobe Help Center)
- Right-click and choose “Enhance” → “Super Resolution.”
- Wait for the 2× enlarged version to generate.
- Apply Gaussian Blur + Unsharp Mask for final polish.
What We Know and What’s Unclear
Confirmed facts
- Pixelation is caused by insufficient resolution or compression artifacts (Canva (online design platform))
- AI tools can improve clarity but cannot restore lost data (Adobe Help Center (official software documentation))
- Photoshop offers manual methods to reduce pixelation appearance (Photography Life (photography review site))
What’s unclear
- Whether AI tools will ever fully restore severely pixelated images to original quality
- The exact algorithm used by Canva’s unpixelate tool (proprietary)
Expert and User Perspectives
Adobe recommends using Soft Light blending mode to alter exposure and contrast without reintroducing pixelation.
— Adobe Help Center (official software documentation)
One Reddit user in r/indesign advises changing display performance to High Quality to reduce the appearance of pixelation in previews—a quick fix for on-screen viewing.
— Reddit user (community advice, via related YouTube tutorial)
The Takeaway
The reality is that pixelation is a form of data loss—you can’t get back what was never captured. But with free AI tools like Canva’s unpixelate feature and professional options like Photoshop’s Super Resolution, you can dramatically improve clarity in most cases. For the casual user, the two-minute Canva fix will solve 80% of problems. For photographers and designers who need every pixel, Photoshop’s manual workflow—blur, sharpen, blend—remains the gold standard. Ultimately, you must decide how much time and quality you need for your specific image.
Related reading: Canva AI Image Upscaler · Canva Image Enhancer
capcut.com, lashondabrown.com, canva.com, youtube.com, canva.com
Frequently asked questions
Does unpixelating an image reduce quality?
No—unpixelating with upscaling tools actually makes the image look less blocky. However, if you save at a lower quality or over-sharpen, you can introduce new artifacts.
Can I fix a pixelated photo on my phone?
Yes. Canva’s mobile app includes the same AI unpixelate tool. Other apps like Remini also offer mobile-based enhancement.
Is there a free way to depixelate images?
Yes. Canva’s free plan includes the AI Unpixelate tool with no credit card required. GIMP is another free desktop alternative.
How long does it take to unpixelate a photo with AI?
Most online AI tools process an image in under 30 seconds. Adobe’s Super Resolution may take a minute or two for larger files.
What file formats work best for unpixelating?
Lossless formats like PNG or TIFF preserve the most detail. JPEGs can be improved but may show blocky artifacts from original compression.
Will unpixelating work on old scanned photos?
It depends on the scan quality. If the scan has decent resolution but looks blocky due to compression, AI tools can help. If the scan is very low-res (e.g., 72 dpi), improvement is limited.
Can I unpixelate a video frame?
Yes, you can extract a frame as an image and apply the same tools. Some video editors (like Topaz Video AI) specialize in frame-by-frame enhancement.
More related posts
 Rest Home Near Me: Costs, Options, and How to Find One in Ireland
 Police Welfare Check McSkimming: IPCA Report & Key Facts
 Kpop Demon Hunters Hentai: Verified Facts & What Is Unclear
 Biggest City in the World 2025: Jakarta Tops Population List
 King of Snake Reviews: Is It Worth the Hype? (2025)
 Christian Dating for Free: Honest Review of Top Sites
 How to Choose a Dehumidifier: 12L vs 20L Size Guide
 NCEA Exam Timetable 2026: Dates, PDF & NZQA Guide